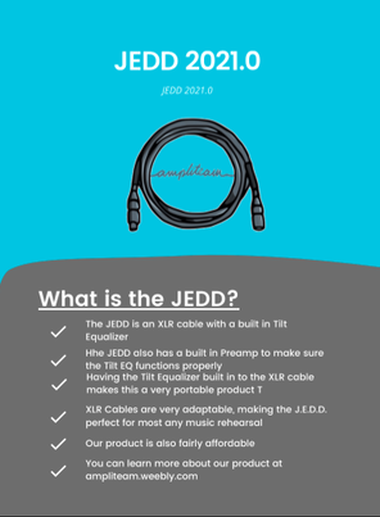
In this project, we focused on a specific field of engineering and made a product to solve a problem. My group focused on Audo Engineering, and designed our product
The product was cut into different phases
The product was cut into different phases
Design Step 1
In this step, we created an idea of what we wanted to do and how we would do it. We made a padlet for brainstormig, a gannt chart to balance our time and made a project proposal for what our idea was. We also made a list of demands and wishes we want in our produt. Finally, we made a survey and sent it to the school so we could learn how to improve our product
|
Project Proposal
|
Demands and Wishlist/Survey Data
|
Design Step 2
In this step, we worked on creating possible prototypes. With an idea in our minds, we now had to brainstorm what we could create to solve the problem. We mad a mind map so we could get an idea of the functions we needed our product to accomplish. Then, we made a classification scheme so we could decipher how we should accomplish those tasks. We used this to decide on three possible designs with possible functions. We then made sketches of the designs so we could get a getter idea of these 3 designs
Here is our Classification Scheme and our Design Selection process
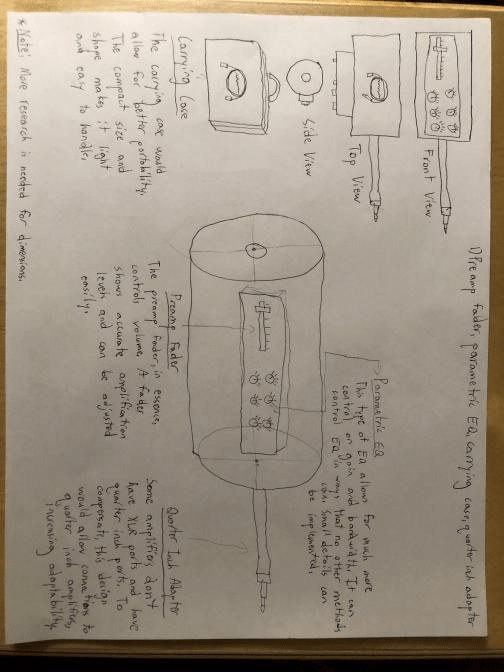
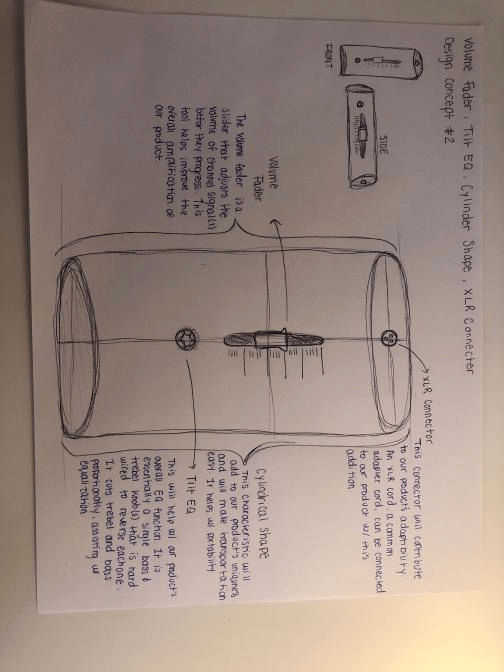
Below are the sketches of our design
|
|

|
Below is our Mind Mao
Design Step 3
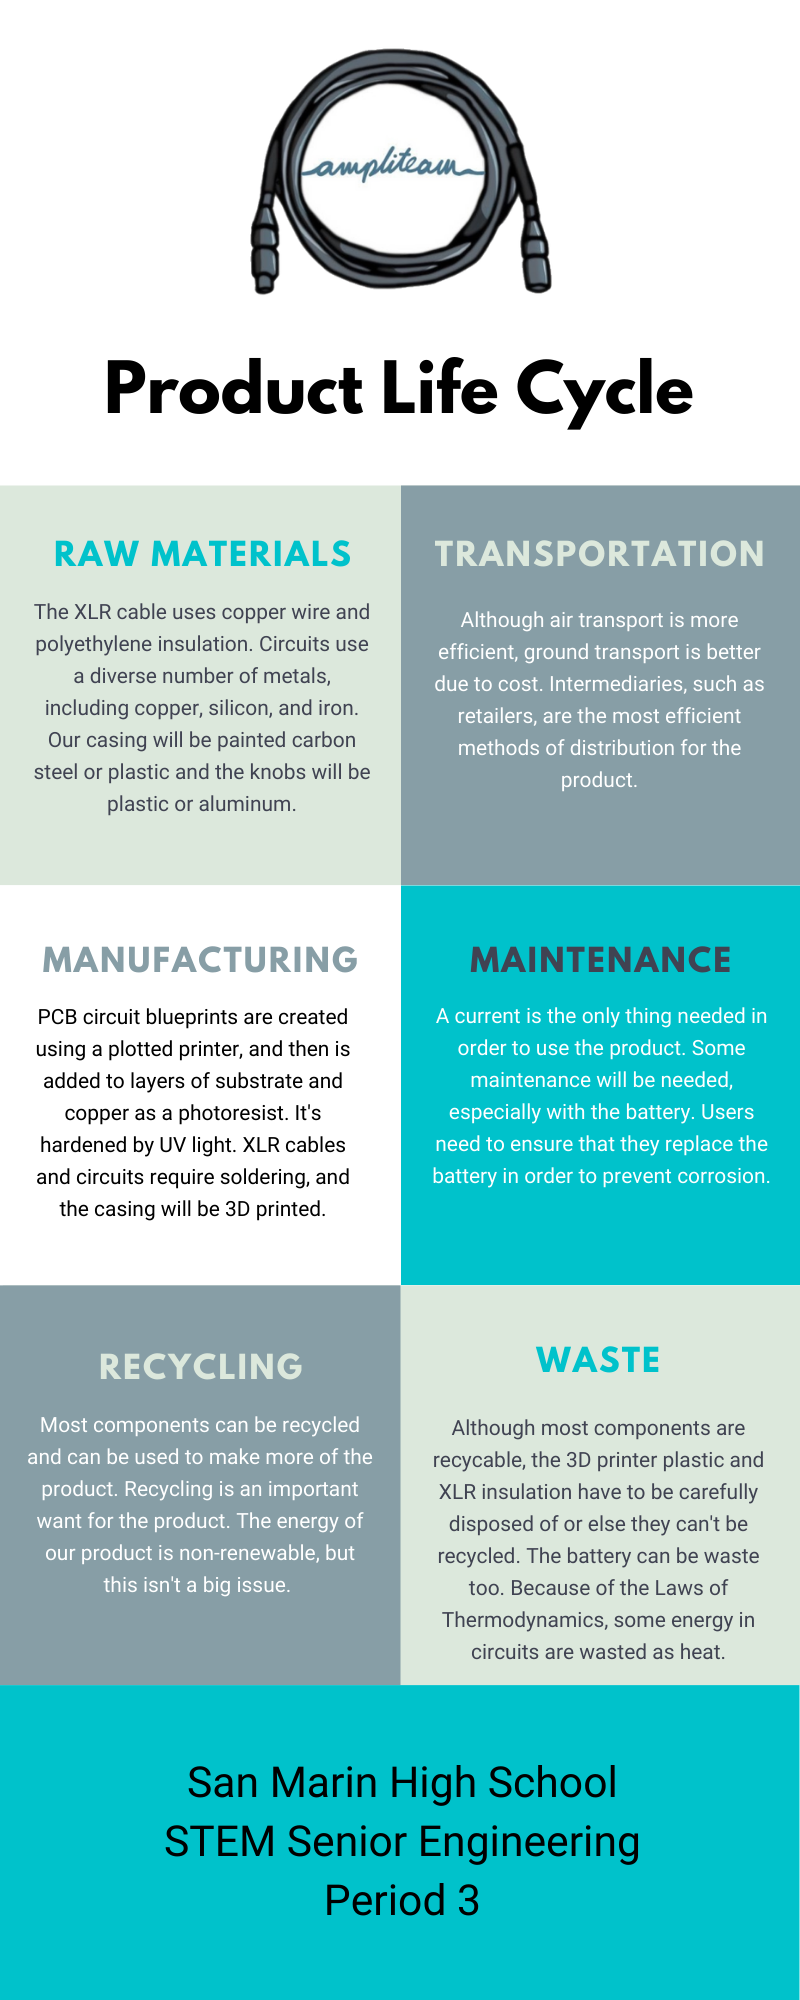
In this step, we tried to develop our project more so we could begin the design. First, we made a decision matrix so we could decide which product design would be the most effective at accomplishing our task. We then made a product life cycle, and discussed how our product would work overtime. We also discussed what would be needed to make the product, and what waste would be created as a byproduct of our product. We also made a graphic so it could be better understood.
Here is our Decision Matrices
Below is our Life Cycle Assesment as well as our infographic
Design Step 4
In this step, we began to test out product to see if it will work. For the test, you can see it all in our lab report. For our test, we created a virtual preamp circuit using Tinkercad. We also had some time spent doing Onshape 3D modeling tutorials so we could better represent our product when we create it.
Design Step 5
Now that we had a design, we have to defend why this design is unique and worth funding. To do this, we made a design defense document and presentation which we then presented to our Mentor to set our product apart. We also made a website to get our name and product out into the world
Below is our design defense document and presentation
Design 6 & 7
After doing ample amounts of research, it was finally time to create a product. We completed work on a functional prototype, although we could not make a physical prototype. Our prototype we made was a digital copy over a few platfors. We made the design of what the prototype would look like on Onshape, a 3D modeling software. We also made the circuit for our Tilt EQ on Tinkercad. After we had made a final product, we made a website to get our names out into the public. Finally, we analyzed the performance of our prototype with a Prototype Analysis document.
Here is a document describing our prototype
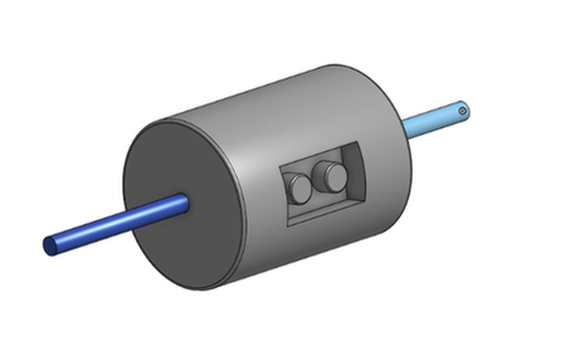
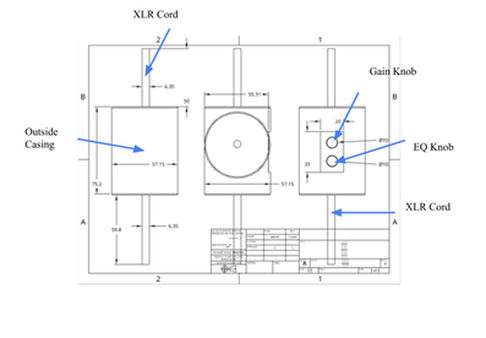
Here is our Onshape 3D Model
|
Here is our Tinkercad Circuit
|
Above is our Prototype Analysis Document
Below is the link to our website with additional information
Design Step 8
After finally making our product, we had to present our product in a way for everyone to see. For this, we made a Final Presentation encapsulating everything we accomplished with out ptoduct. Additionally, we made some more marketing materials, such as our Poster, our Commercial and our Business Cards, which can be seen below. We also made a Final Design Report to further encapsulate our report
Here is our Poster for our product
|

Here is our Business Cards for the Ampliteam
|
Below is our commercial for our product
Below is our final presentation, as well as two videos discussing the presentation
|
The video below covers our presentation
|
The video below covers our circuit and how it functions
|
Below is our final project report document
